Tampilkan postingan dengan label appetizers. Tampilkan semua postingan
Smoked Salmon Pizza

Smoked Salmon Pizza

I'm not sure how or when I came across this recipe for Smoked Salmon Pizza, but every time I looked through my huge stack of printed recipes I'd see it. While we're on the subject, yes I print recipes I want to make because I like having a hard copy in front of me while I'm cooking so I can make notes. And yes, I desperately need a better filing system than stuffing the pile of papers into a reusable grocery bag.

Ahem.
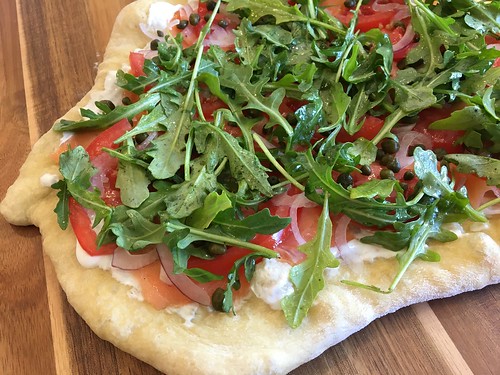
Smoked salmon pizza

I've been eyeing up this recipe for a while but I could never find a good time to make it. Then our friends invited us over for brunch and I finally got a chance to try it. As an aside, I love that my friend didn't blink when I asked if I could use her kitchen, or when I busted out my pizza stone, parchment paper and all the various toppings I'd put in individual containers.

This was a cinch to make and I loved the crispy pizza crust with the luscious smoked salmon, salty capers and the tang of the red onion. Next time I think I'll swap the sour cream (which I subbed for cr�me fraiche) for cream cheese to make it more like a bagel, while also adding some of the same seasonings found on my favorite bagel of all time, the everything bagel. I hear Trader Joes makes an everything bagel seasoning blend. I really need to get my hands on some of that!

Our Best Ever Smoked Salmon Pizza
Modified from Spoon, Fork, Bacon

1/2 a ball of pizza dough (homemade or store bought)
Olive oil
1/2 cup cream cheese, sour cream or cr�me fraiche
4oz sliced smoked salmon or lox
Thinly sliced tomato
Thinly sliced red onion
1/4 cup capers, drained
1/2 cup baby arugula
Lemon juice
Salt and pepper, to taste
Dried dill

Preheat the oven to 425�F with a pizza stone on the center rack.

Roll out the dough on a piece of parchment paper dusted with flour. Pierce the surface all over with a fork and brush with small amount olive oil. Remove the pizza stone from the oven and transfer the parchment paper to the stone. If you have a pizza peel (I really need to get one of these) just put the pizza dough directly on the heated stone.

Bake for 10-12 minutes or until the crust is golden brown and crisp. Remove from oven and allow crust to cool a bit before adding the toppings.

Spread the cream cheese/sour cream/cr�me fraiche on the crust and top with pieces of the salmon and tomato. Sprinkle on the red onions and capers. Toss the arugula with some lemon juice, salt and pepper and add that to the pizza. Add a sprinkling of dill, cut into wedges and serve.
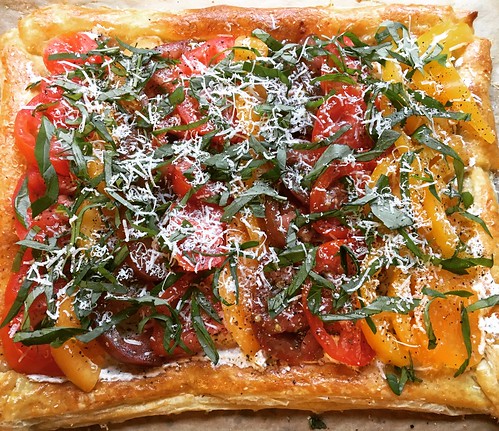
Tomato and Goat Cheese Tart

Tomato and Goat Cheese Tart

Do you ever see a recipe and just know, instinctively, that it's going to be amazingly delicious? That's how I felt when I read my friend Kylee's post about this Tomato and Goat Cheese Tart . I could practically taste the buttery, flaky crust, the ripe, juicy tomatoes and the tang of the goat cheese. I couldn't wait to make it.

Goat cheese and tomato tart

I tried to find the Nature Sweet tomatoes Kylee mentions in her post (Eclipse tomatoes), but the stores near me don't seem to carry them (despite the Nature Sweet site claiming they did). I ended up splurging on heirloom tomatoes and I'm so glad I did. All I can say is wow. I'm lucky to live in an area known for amazing tomatoes, but it's not quite peak season yet. The heirlooms I picked up were stunning and really brought the whole tart together.

Katie helped me mix up the goat cheese spread the day before and then I assembled and baked the tart at my parent's house. We ate it as an app and holy guacamole was it delicious. Everything comes together beautifully and we were all sad when it was gone. My aunt is coming for a visit this weekend and since a pack of puff pastry comes with two sheets I'll be using her visit as an excuse to make this again. It's the perfect summer treat since you really want to make this when tomatoes are at their best. The only downside is that this wouldn't reheat well, so plan to devour the whole thing in one sitting. Maybe that's not such a bad thing...

Tomato & Goat Cheese Tart
Slightly modified from Kylee Cooks

1 puff pastry sheet, thawed in the fridge
1 egg, beaten
Grated Parmesan or Pecorino cheese
4 oz goat cheese, softened (a small log, the ones in my supermarket are 4oz)
1 clove garlic, grated
1 teaspoon dried Italian seasoning
4 heirloom tomatoes, sliced then cut into half-moons
1/2 cup fresh basil, chopped roughly
Salt & pepper

Preheat the oven to 425.

Place the sheet of puff pastry on a piece of parchment laid on a pizza stone or baking sheet. Use a rolling pin to gently flatten and spread out the pastry so it's smooth as well as longer and wider than when you started.

Using a sharp knife, cut a 1/2-inch strip off the pastry on all four sides. Keep the strips - you'll be adding them back onto the pastry in a minute. Brush all the pastry with the beaten egg, then put each strip you just cut back onto the dough, essentially making a border around the edges (Katie said it looked like a picture frame). Use the tines of a fork to press the strips down so they stick to the pastry underneath. Prick the entire surface (where the picture would go) with a fork. Sprinkle with some Parmesan or Pecorino cheese.

Bake for 15 minutes until puffed and golden.

Mix together the goat cheese, garlic and Italian seasoning. This can be done a day or two ahead of time. Once the puff pastry is golden brown, remove it from the oven. Spread the goat cheese mixture over the center area of the pastry (now you'll really see what Katie meant by it looking like a picture frame).

Top the goat cheese with slices of tomato. I bought different colored heirlooms so I alternated the colors to make it look pretty. Keep the tomato slices close together - you really want to pack them on for maximum flavor. Sprinkle the chopped basil and extra Parmesan or Pecorino cheese on top, then season with a little salt and pepper. Cut the tart into slices and serve.
Grilled Shrimp with Anchovy Butter

Grilled Shrimp with Anchovy Butter

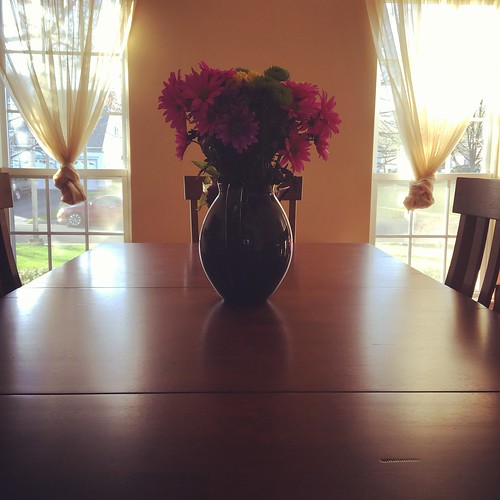
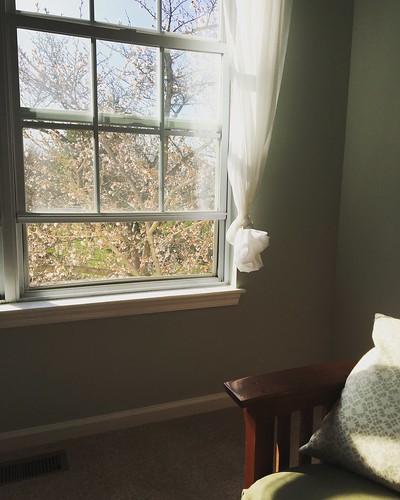
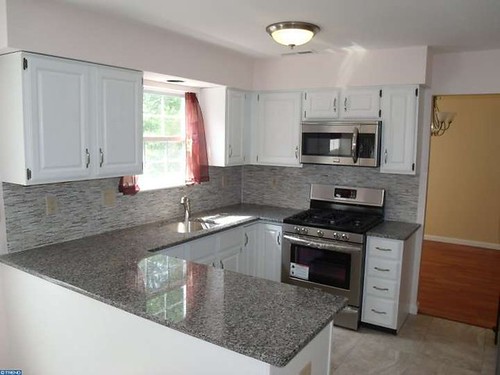
Heeeeeeeeeey!!! I am SUPER excited to announce that we're officially in the new house. Squeeeeeeeee! It's been a crazy whirlwind these last few months but we're settling in and, shockingly, we're finding that this house already feels like home. Here are some photos of our new digs, including the listing photo of the kitchen:

Home pics

Home pics

Home pics

I'll admit, I was a bit nervous about cooking in this kitchen. It may look nice, but it was most definitely NOT designed by someone who enjoys cooking. For starters, there's no triangle. And insufficient storage. Heck, there isn't even a silverware drawer. Needless to say, a kitchen remodel is on the horizon...just as soon as we save up the necessary funds to do it right. We'll be knocking down the wall where the stove is and expanding into the space that was previously the dining room. That's why we turned the formal living room into the dining room.

Shrimp with anchovy butter

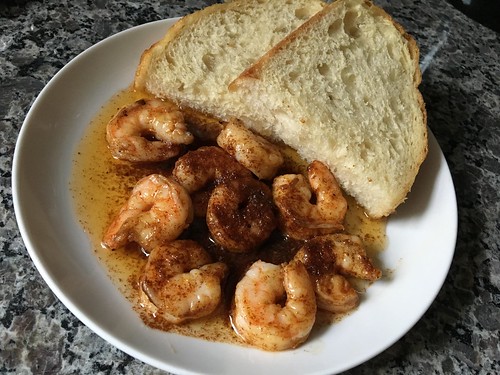
Sigh. We are just so in love with the space, the neighborhood, everything. I still can't quite believe we pulled it off. But enough about the new house...on to the recipe! I first had grilled shrimp with anchovy butter at least 20 years ago (likely closer to 25...eeek!) at Hamilton's Grillroom. It's been a staple on their ever-changing menu for all this time, and for good reason - it's delicious. And so simple. They serve massive shrimp at the Grillroom, but all I had on hand were these smaller ones. It doesn't make too much of a difference, but I may splurge on larger shrimp next time so they can spend a bit more time on the grill and get that wonderfully smoky char.

Grilled Shrimp with Anchovy Butter
Inspired by Hamilton's Grillroom

1/2-lb shell-on shrimp, any size (go for the larger ones, if you can)
6 tablespoons butter
half a tin of anchovies
crusty bread, for serving

Prepare your grill. If the shrimp are on the smaller side, place them on skewers so they're easier to flip. Grill until just pink.

Meanwhile, melt the butter with the anchovies in a small skillet. You want the anchovy filets to melt into the butter.

When the shrimp are cooked, divide them evenly on plates. Top each with some of the anchovy butter. Serve with slices of crusty bread to sop up all the delicious butter.
Baked Camembert

Baked Camembert

Do you remember when food blogs weren't nearly as plentiful as they are today? Back when I started blogging (August 2006!) the Internet was a much quieter place. One of the first food blogs I stumbled on was The Food Pornographer. She rarely posts recipes - her focus is on restaurants and photos of food - but she did post this one for Baked Camembert, which her extended family likes to make for special occasions.

Untitled

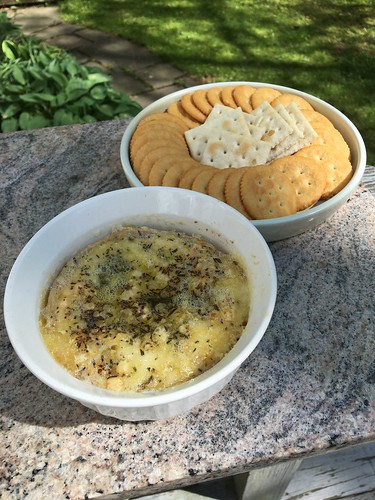
I made the same tweaks that they did - more garlic, no nuts or cranberries - and served it with crackers as our first course on Mother's Day.

Untitled

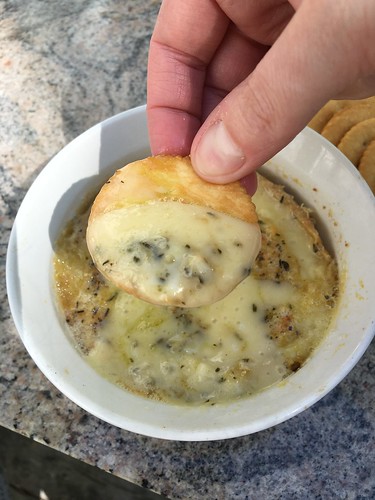
The smell of the garlic and rosemary baking in the oven was downright intoxicating. As soon as it came out of the oven we all descended like vultures and it was quickly devoured. Poor Steve is lactose intolerant so he took a Lactaid pill to enjoy the cheesy deliciousness. And then Katie proceeded to all but elbow him out of the way to get to the cheese. I had to restrain her so Daddy could have a few bites. That girl loves cheese, just like her parents.

Baked Camembert
Modified from Jamie Oliver

8oz Camembert cheese
2 cloves garlic, thinly sliced
1 teaspoon fresh rosemary leaves, minced
olive oil
crackers or bread for dipping

Preheat the oven to 350.

Cut off the rind from one side of the cheese. Put the cheese into an oven-safe ramekin. Press the sliced garlic into the top of the cheese, then sprinkle with the minced rosemary. Drizzle with a little olive oil. Bake in the preheated oven for 15 to 20 minutes, until the cheese is soft and gooey.

Allow to cool slightly, then serve with crackers or bread cubes for dipping.
Dill Pickle Dip

Dill Pickle Dip

People. People! Have I got an amazing party treat for you.

I had this recipe for Dill Pickle Dip saved for almost a year before I got around to making it. Why? Because we so rarely go to parties these days. Sad, but true. So when a friend invited a group of moms over for a post-Valentine's Day party, I knew this was my chance.

Dill pickle dip

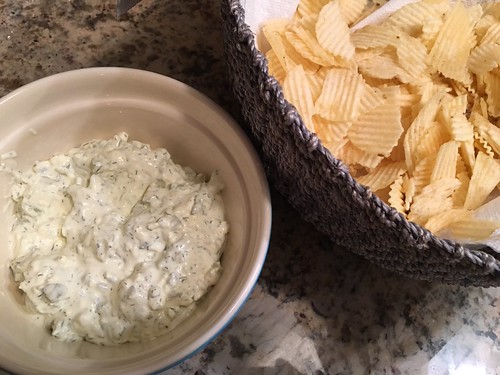
As soon as I unpacked the chips and dip, all the moms were oohing and ahhing. Apparently I'm not the only one who loves pickles. I hadn't bothered to photograph the dip beforehand, not knowing just how good it would be, so as soon as everyone started raving I grabbed the chips and the plastic container I'd brought the dip in, asked the hostess for a proper bowl, and went into the kitchen to take a quick photo.

Rebecca said this dip is also amazing as a burger topping and I can't wait to test that out.

Dill Pickle Dip
As seen on Foodie with Family

1 (8 ounce) package cream cheese, softened to room temperature
1 cup chopped dill pickles
1/4 cup finely chopped sweet onion
4 tablespoons pickle juice (use less for thicker dip or more for thinner dip)
1 teaspoon dried dill weed
salt and pepper, to taste
Pretzels, vegetable sticks, crackers, or potato chips for serving

Place the cream cheese in a bowl and use a wooden spoon to press and loosen the cream cheese. Stir in all of the remaining ingredients and mix until evenly distributed. Cover with plastic wrap and refrigerate for at least an hour before serving.

If you have any leftovers, this dip will keep for up to a week tightly covered in the refrigerator. It may become thinner as it sits.
Pork and Shrimp Dumplings

Pork and Shrimp Dumplings

The theme for our latest dinner with our friends C & T was Asian food. We usually pick one recipe to make at T's house and this time we chose Steamed Dumplings. I've never made dumplings before and incorrectly assumed they'd be a lot of work. Nope!

Asian night
(all photos by T. Casey)

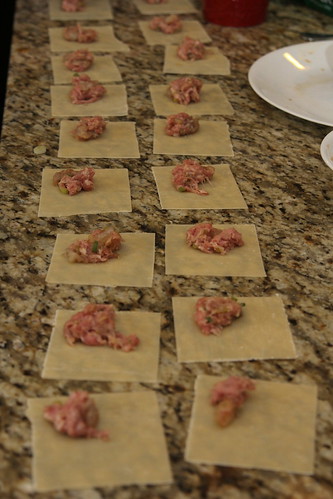
T always cons me into doing all the work (just kidding, I love cooking in her gorgeous kitchen). After I mixed up the filling we assembled the first batch, placing up a little bit of filling onto each dumpling wrapper, wiping the edges with water, and then folding the dough into a triangle. Then we pinched the two edges together to make little packages.

Asian night

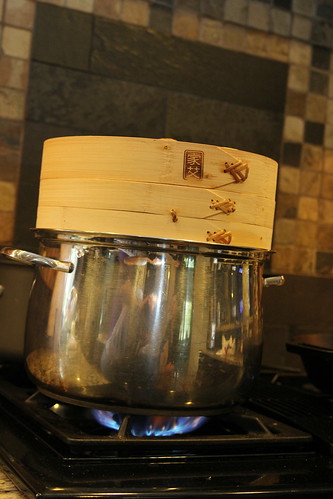
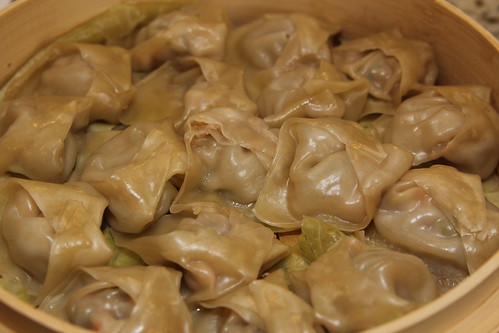
SP and I got a bamboo steamer as a wedding present and had never used it. Oops! We lined the bottom with cabbage leaves, placed the dumplings on top and set it over a pot of boiling water for 10 minutes.

Asian night

These dumplings were outstanding. They had great flavor from the filling and the dipping sauce (which mirrored those same flavors) was perfect. We all gobbled them up. We doubled the recipe below so we had 40+ dumplings for 6 adults and 2 kids and it wasn't enough. Thankfully we had extra filling and T had more wrappers in her fridge, so I quickly assembled another 20 dumplings. The kids would run into the room, grab a handful of dumplings off the platter and run off to play, then come back for more. So, so good.

Asian night

I can't wait to make these again. My mom has already put her in request.

Pork and Shrimp Dumplings
From Rasa Malaysia
Makes about 20-24 steamed dumplings

1/2 pound ground pork
8-10 medium-sized shrimp, peeled, deveined, and cut into small pieces
1 scallion, finely chopped
3 dashes white pepper
1 teaspoon Shaoxing wine or sherry
1/2 teaspoon salt
1/2 teaspoon soy sauce
1/4 teaspoon sesame oil
1 inch ginger, peeled and grated
1 pack potsticker/dumpling wrappers

Combine the ground pork, shrimp, chopped scallions, ginger, and all the seasonings together. Mix well and set aside.

To make dumplings, place a small spoonful of the filling in the center of a wrapper. Dab a little water with your finger and circle around the edge of the skin, and then fold and pleat the dumpling accordingly. Repeat the same for the rest.

Arrange the dumplings in a bamboo steamer (lined with parchment paper or cabbage leaves at the bottom) and steam for 8-10 minutes. Serve immediately with dipping sauce.

To pan fry the dumplings: heat a large skillet and swirl some oil around to coat the pan. Add a single layer of pot stickers. Cook for 2 to 3 minutes until they begin to turn golden on the underside. Don't move them. Add 1/4 cup of water to the pan and cover immediately. Cook for 5 minutes, or until the meat is cooked through and the dumplings release from the pan. Serve immediately with the dipping sauce.

Soy-Vinegar Dipping Sauce
From Martha Stewart

1/2 cup soy sauce
1 teaspoon rice vinegar
1/2 teaspoon toasted sesame oil
2 teaspoons sugar
1 scallion, trimmed and sliced
2 tablespoons water

Combine all ingredients for the dipping sauce in a small bowl.
Fried Mozzarella Sticks

Fried Mozzarella Sticks

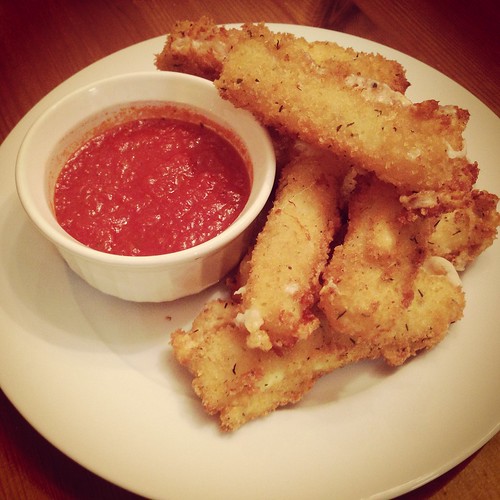
Baby Girl loves cheese sticks. She eats them as a snack almost every day after school. Or rather, she used to. One week I noticed the package in the fridge was still mostly full so I checked the expiration date. It was that weekend. Since the Super Bowl was coming up I figured I'd turn them into Fried Mozzarella Sticks and went searching for a recipe.

Untitled

The key to any mozzarella stick recipe is to freeze the cheese sticks before you bake or fry them. I'm not sure why the recipe I used doesn't say to do that but it's an absolute MUST. The cheese will melt if it's anywhere close to room temperature. Heck, even mine frozen started to melt and ooze as they fried. So do not, under any circumstances, forget that step.

These were delicious, full of melty, gooey cheese. I only made 8 since it was just the three of us. SP and I each had three and Baby Girl devoured two. I'll definitely be making these again the next time we have cheese sticks that need to be used up.

Fried Mozzarella Sticks
Modified from Add a Pinch

24 mozzarella sticks
1 cup buttermilk
1 egg
1 cup flour
3 cups panko
1 tablespoon Italian seasoning
vegetable oil
pizza or marinara sauce, for dipping

The day before you plan to make these, place however many cheese sticks you want to eat into the freeze. Freeze them overnight. Do not skip this step!

The next day, prepare three separate bowls for dredging your mozzarella sticks. Whisk the buttermilk and the egg in one bowl. Put the flour in the second bowl. In the third bowl, combine the panko and the Italian seasoning.

Dip each cheese stick into the buttermilk, then into the flour, then back into the buttermilk and finally into the panko. Set aside on a sheet pan until all the cheese sticks have been coated.

Pour about 1 inch of oil into a 12-inch non-stick skillet. Heat over medium heat until the oil starts to shimmer. Add a few cheese sticks at a time, being careful not to crowd the pan. Use tongs to remove them as they turn golden brown.

Place on a baking sheet lined with paper towels to drain. Serve warm with pizza or marinara sauce for dipping.